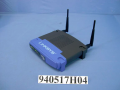
Linksys WRT54G v4.0
Linksys WRT54G v4
Manuf (OEM/ODM): CyberTAN
FCC approval date: 31 May 2005
Country of manuf.: China
S/N prefix: CDFA
Series: WRT54G
Local image
Type: wireless router
FCC ID: Q87-WT54GV40
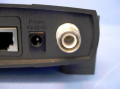
Power: 12 VDC, 1 A
Connector type: barrel
Conn. measurements: 5 mm (OD), 2.5 mm (ID), 12 mm (LEN)
CPU1: Broadcom BCM5352E (200 MHz)
FLA1: 4 MiB4,194,304 B <br />32,768 Kib <br />4,096 KiB <br />32 Mib <br />0.00391 GiB <br /> (Intel TE28F320C3BD90)
RAM1: 16 MiB16,777,216 B <br />131,072 Kib <br />16,384 KiB <br />128 Mib <br />0.0156 GiB <br /> (Hynix HY5DU281622ET-J)
Expansion IFs: none specified
JTAG: yes, 12-pin header, unpopulated
Serial: yes, 10-pin header, unpopulated, (115200,8,N,1)
WI1 chip1: Broadcom BCM5352E
WI1 chip2: Broadcom BCM2050
WI1 802dot11 protocols: bg
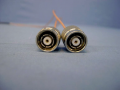
WI1 antenna connector: RP-TNC
ETH chip1: Broadcom BCM5352E
Switch: Broadcom BCM5352E
LAN speed: 100M
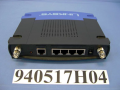
LAN ports: 4
WAN speed: 100M
WAN ports: 1
bg
Stock bootloader: CFE
Stock FW OS: Linux
TPFirmware supported: DD-WRT • (List), Gargoyle, OpenWrt • (List | Dev | DLs), Tomato • (List | DLs), TomatoUSB • (List | DLs), Broadband-Hamnet
Default SSID: linksys (50 addl. devices)
Default IP address: 192.168.1.1
the IP 192.168.1.1 is used by 1297 additional devices
of which 153 are Linksys devices
Default login user: blank
Default login password: admin
blank:admin credentials used by 289 additional devices
of which 142 are Linksys devices
| FCC ID | |
|---|---|
| Linksys WRT54G-RG | Q87-WT54GV40 |
| Linksys WRT54G-TM | Q87-WT54GV40 |
| Linksys WRT54GL v1.0 | Q87-WT54GV40 |
| Linksys WRT54GL v1.1 | Q87-WT54GV40 |
| Linksys WRT54GS v3 | Q87-WT54GV40 |
| Linksys WRT54GS v4 | Q87-WT54GV40 |
| Linksys WRT54GS v5.0 | Q87-WT54GV40 |
| Linksys WRT54GS v5.1 | Q87-WT54GV40 |
| CPU1 brand | WI1 chip1 brand | WI1 chip2 brand | |
|---|---|---|---|
| Linksys WRT54G v1.0 | Broadcom | Broadcom | Broadcom |
| Linksys WRT54G v1.1 | Broadcom | Broadcom | Broadcom |
| Linksys WRT54G v2.0 | Broadcom | Broadcom | Broadcom |
| Linksys WRT54G v2.2 | Broadcom | Broadcom | Broadcom |
| Linksys WRT54G v3.0 | Broadcom | Broadcom | Broadcom |
| Linksys WRT54G v3.1 | Broadcom | Broadcom | Broadcom |
| Linksys WRT54G v4.0 | Broadcom | Broadcom | Broadcom |
| Linksys WRT54G v5.0 | Broadcom | Broadcom | Broadcom |
| Linksys WRT54G v6.0 | Broadcom | Broadcom | Broadcom |
| Linksys WRT54G v7.0 | Atheros | Atheros | |
| Linksys WRT54G v7.2 | Broadcom | Broadcom | |
| Linksys WRT54G v8.0 | Broadcom | Broadcom | |
| Linksys WRT54G v8.1 | Broadcom | Broadcom | |
| Linksys WRT54G v8.2 | Broadcom | Broadcom | |
| Linksys WRT54GH | Ralink | Ralink |
For a list of all currently documented Broadcom chipsets with specifications, see Broadcom.
Wireless-G Broadband Router
Links of Interest
Flashing
| NOTE: During configuration or flashing a device, the only things that should be hooked to the device is the computer and power. |
Flashing DD-WRT
| WARNING: Requires K2.4 for DD-WRT, Do not flash anything else! |
| WARNING: Only DD-WRT v23 and newer will run on this model. If you use an older version, you will need to Recover from a Bad Flash. |
| • Install Guide |
|---|
The stock firmware from Linksys on the WRT54G v4 won't accept a firmware image over 3MB in size (you will get the error: :"Upgrade are failed!" if you try) so you will need to flash the mini version of DD-WRT onto the router BEFORE flashing any other versions.
|
Flashing OpenWrt
Flashing Gargoyle
Flashing Tomato
Upgrading
| • Upgrade DD-WRT |
|---|
Updating DD-WRTIf dd-wrt is already on the router follow these instructions. If stock firmware is on the router follow the flashing instructions.
Important1: This Hard reset or 30/30/30 works fine for Asus router, but you do have to power cycle after the reset. Important2: After you flash the firmware, and before you do the hard reset, the router will be building some nvram settings. YOU MUST WAIT FOR THIS TO FINISH PRIOR TO DOING ANYTHING WITH THE ROUTER INCLUDING A HARD RESET. Usually, you can tell when this process is completed by the WAN light coming on, but it does take several minutes. Go have a beer. There are starting to be more and more people who BRICK their routers by not waiting until the nvram is rebuilt, PRIOR to doing a hard reset. YOU NEED TO WAIT! |
Reverting
Reverting to OEM Firmware from DD-WRT
| • Reverting |
|---|
|
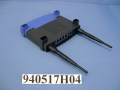
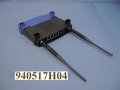
JTAG-Serial Info
JTAG
JTAG Pinouts
 nTRST   1o o2	GND
   TDI   3o o4	GND
   TDO   5o o6	GND
   TMS   7o o8	GND
   TCK   9o o10	GND
 nSRST  11o o12  N/C
Using Universal JTAG Adapter
 white    1o o2	 black
   red    3o o4	 GND
  blue    5o o6	 GND
 green    7o o8	 GND
 yelow    9o o10  GND
 orange  11o o12  N/C
DD-WRT Recovery
| • Recovery |
|---|
JTAG Recovery
TFTP
SerialSerial PinoutsVCC 1 o o 2 VCC TX1 3 o o 4 TX0 RX1 5 o o 6 RX0 N/C 7 o o 8 N/C GND 9 o o 10 GND Hyper terminal Setup in Windows XPIn Windows XP, Click Start Button - All Programs - Accessories -
Communication - HyperTerminal
Enter a name for the connection, Click ok
Choose com port you adapter is plugged into, Click ok
Set:
Bits per second = 115200
Data Bits = 8
Parity = none
Stop bits = 1
Flow control = none
Click ok
Click File - Save As, and select a place to save it to so you
don't have to enter the settings again.
Putty Setup in Windows XPAfter installing putty, run it Serial line = The COM port your using for serial (ie. COM3) Speed = 115200 Click on Serial under Connection Serial line to connect to = same as above (Serial line) Speed (baud) = 115200 Data bits = 8 Stop bits = 1 Parity = none Flow control = none Click Session Enter a name for your connection under saved sessions Click Save Click Open DD-WRT Serial RecoveryModified Redhawk0 instructions
|
USB Info
No USB
vlan Info
DD-WRT vlan Info
Defaults
"/proc/switch/eth0" exists
1 2 3 4 | case labels
3 2 1 0 | nvram port numbers
| • nvram show |
|---|
root@DD-WRT:~# nvram show | grep vlan.ports
vlan1ports=4 5
vlan0ports=3 2 1 0 5*
size: 19872 bytes (12896 left)
root@DD-WRT:~# nvram show | grep port.vlans
port5vlans=0 1 16
port4vlans=0
port3vlans=0
port2vlans=0
port1vlans=0
port0vlans=1
size: 19872 bytes (12896 left)
root@DD-WRT:~# nvram show | grep vlan.hwname
vlan1hwname=et0
vlan0hwname=et0
size: 19872 bytes (12896 left)
root@DD-WRT:~# lsmod
Module Size Used by
ip_nat_pptp 2560 0 (unused)
ip_conntrack_pptp 3036 1
ip_nat_proto_gre 1664 0 (unused)
ip_conntrack_proto_gre 2584 0 [ip_nat_pptp ip_conntrack_pptp]
etherip 5104 0 (unused)
switch-robo 5356 0 (unused)
switch-core 6352 0 [switch-robo]
root@DD-WRT:~# ls /proc/switch
eth0
root@DD-WRT:~# cat /proc/switch/eth0/vlan/0/ports
0 1 2 3 5t*
root@DD-WRT:~# cat /proc/switch/eth0/vlan/1/ports
4 5t
root@DD-WRT:~# cat /proc/switch/eth0/vlan/2/ports
4
root@DD-WRT:~#
nvram commandsroot@DD-WRT:~# nvram set vlan1ports="3 4 5" root@DD-WRT:~# nvram set vlan0ports="2 1 0 5*" root@DD-WRT:~# nvram commit root@DD-WRT:~# reboot nvramPort 1 moved to WAN vlan root@DD-WRT:~# nvram show | grep vlan.ports vlan0ports=2 1 0 5* vlan1ports=3 4 5 size: 19850 bytes (12918 left) root@DD-WRT:~# nvram show | grep port.vlans port5vlans=0 1 16 port3vlans=0 port1vlans=0 size: 19850 bytes (12918 left) port4vlans=0 port2vlans=0 port0vlans=1 root@DD-WRT:~# nvram show | grep vlan.hwname vlan1hwname=et0 size: 19850 bytes (12918 left) vlan0hwname=et0 root@DD-WRT:~# GUIPort 4 moved to WAN vlan root@DD-WRT:~# nvram show | grep vlan.ports vlan1ports=4 5 vlan0ports=3 2 1 0 5* size: 20005 bytes (12763 left) root@DD-WRT:~# nvram show | grep port.vlans port5vlans=0 1 16 port4vlans=1 18 19 port3vlans=0 18 19 port2vlans=0 18 19 port1vlans=0 18 19 port0vlans=1 18 19 size: 20005 bytes (12763 left) root@DD-WRT:~# nvram show | grep vlan.hwname vlan1hwname=et0 vlan0hwname=et0 size: 20005 bytes (12763 left) root@DD-WRT:~# |
Pictures
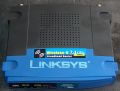
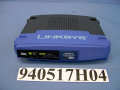
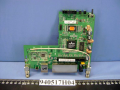
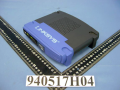
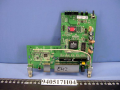
Top
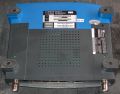
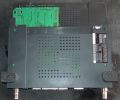
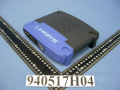
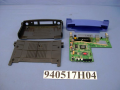
Bottom

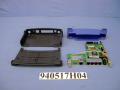
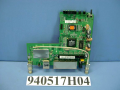
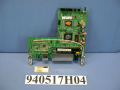
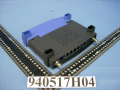
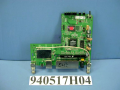
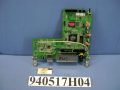
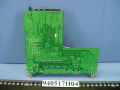
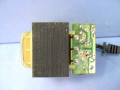
Board Top
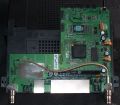
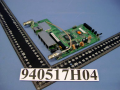
Board Top 2
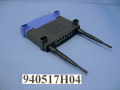
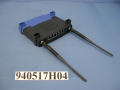
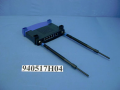
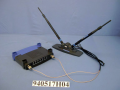
Bottom JTAG & Serial
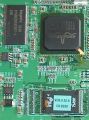
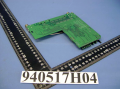
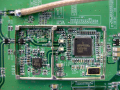
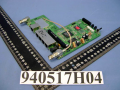
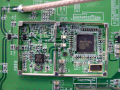
Chips
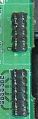
JTAG & Serial
JTAG Bottom


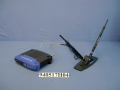
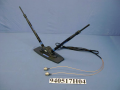
WRT54G v4 w/ 2 dBi Ant
WRT54G v4 w/ 2 dBi Ant

WRT54G v4 w/ 5 dBi Ant
WRT54G v4 w/ 5 dBi Ant
WRT54G v4 w/ 7 dBi Ant
WRT54G v4 w/ 7 dBi Ant

WRT54G v4 w/ 7 dBi Ant
WRT54G v4 w/ 7 dBi Ant
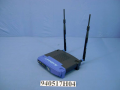
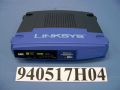
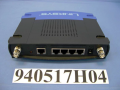
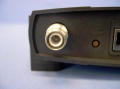
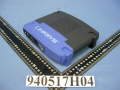
WRT54G v4

WRT54G v4
WRT54G v4
WRT54G v4
WRT54G v4

WRT54G v4

WRT54GS v3 w/ 2 dBi Ant
WRT54GS v3 w/ 2 dBi Ant

WRT54GS v3 w/ 5 dBi Ant
WRT54GS v3 w/ 5 dBi Ant

WRT54GS v3 w/ 7 dBi Ant

WRT54GS v3 w/ 7 dBi Ant
WRT54GS v3 w/ 7 dBi Ant

WRT54GS v3 w/ 7 dBi Ant

WRT54GS v3

WRT54GS v3
WRT54GS v3
WRT54GS v3

WRT54GS v3
WRT54GS v3
WRT54G v4

WRT54G v4
WRT54G v4
WRT54G v4
WRT54G v4
WRT54G v4
WRT54G v4
WRT54G v4
WRT54G v4
WRT54G v4
WRT54GS v3
WRT54GS v3
WRT54GS v3
WRT54GS v3

WRT54GS v3
WRT54GS v3
WRT54GS v3
WRT54GS v3
WRT54GS v3
WRT54GS v3
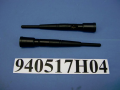
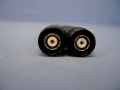
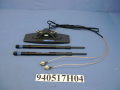
2 dBi Ant
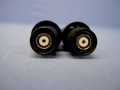
2 dBi Ant
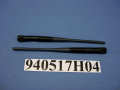
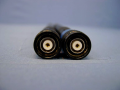
5 dBi Ant
5 dBi Ant
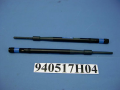
7 dBi Ant
7 dBi Ant
7 dBi Ant
7 dBi Ant
7 dBi Ant
7 dBi Ant
7 dBi Ant
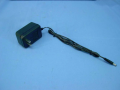
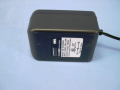
Model: D12-1A
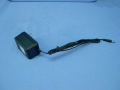
Model: D12-1A
Model: D12-1A

Model: D12-1A
Model: D12-1A
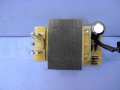
Model: D12-1A
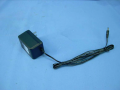
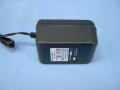
Model: AM-1201000D41
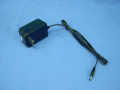
Model: AM-1201000D41
Model: AM-1201000D41
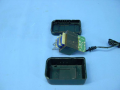
Model: AM-1201000D41
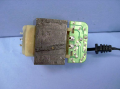
Model: AM-1201000D41
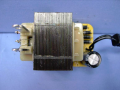
Model: AM-1201000D41

WRT54GS v3 Label

WRT54G v4 Label
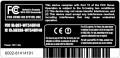
Other Label


Notes
DD-WRT Troubleshooting
- If your router fails to reboot (power light doesn't stop flashing, no web interface, etc) you will need to Recover from a Bad Flash.
