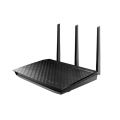
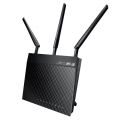
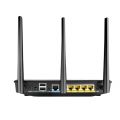
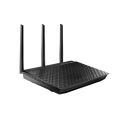
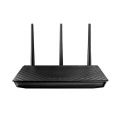
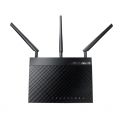
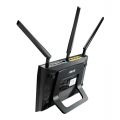
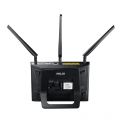
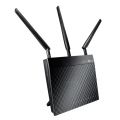
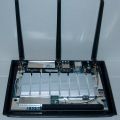
ASUS RT-N66U
ASUS RT-N66U B1 (Rev.3.00)
Availability: common
Manuf (OEM/ODM): Askey
FCC approval date: 07 December 2011
(Est.) release date: 22 December 2011
(Est.) initial retail price (in USD): $180
UPC: 886227037353 (UPC DB, On eBay)
Country of manuf.: China
S/N prefix: C21A08
Series: N900
Amazon image
ASIN
B006QB1RPY (![]() , On Amazon, On CCC)
, On Amazon, On CCC)
multiple revisions of this device, use caution
On Newegg
Type: wireless router
FCC ID: MSQ-RTN66U, MSQ-RT0K00
IC ID: 3568A-RTN66U
Power: 19 VDC, 1.58 A
Connector type: barrel
CPU1: Broadcom BCM4706 (600 MHz)
FLA1: 32 MiB33,554,432 B <br />262,144 Kib <br />32,768 KiB <br />256 Mib <br />0.0313 GiB <br /> (Spansion S29GL256P10TFI01)
RAM1: 256 MiB268,435,456 B <br />2,097,152 Kib <br />262,144 KiB <br />2,048 Mib <br />0.25 GiB <br /> (Samsung K4T1G164QF-BCF7 × 2)
Expansion IFs: USB 2.0
USB ports: 2
JTAG: yes, 10-pin header
Serial: yes, 4-pin header
WI1 chip1: Broadcom BCM4331
WI1 802dot11 protocols: bgn
WI1 MIMO config: 3x3:3
WI1 antenna connector: U.FL, RP-SMA
WI2 chip1: Broadcom BCM4331
WI2 802dot11 protocols: an
WI2 MIMO config: 3x3:3
WI2 antenna connector: U.FL, RP-SMA
ETH chip1: Broadcom BCM4706
Switch: Broadcom BCM53125
LAN speed: 1GbE
LAN ports: 4
WAN speed: 1GbE
WAN ports: 1
abgn
Stock bootloader: CFE
Stock FW OS: Linux 2.6.22.19
TPFirmware supported: AsusWRT-Merlin • (Wiki | List), DD-WRT • (List), OpenWrt • (List | Dev | DLs), TomatoUSB RAF (Victek) • (List | DLs), TomatoUSB • (List | DLs), AdvancedTomato • (List | DLs), FreshTomato • (List | DLs)
Flags: MicroSD Card slot
Default SSID: ASUS (97 addl. devices)
, ASUS_5G (44 addl. devices)
Default IP address: 192.168.1.1
the IP 192.168.1.1 is used by 1305 additional devices
of which 167 are ASUS devices
Default login user: admin
Default login password: admin
admin:admin credentials used by 1327 additional devices
of which 199 are ASUS devices
802dot11 OUI: 08:60:6E (1 E, 1 W), 30:85:A9 (3 E, 3 W), 50:46:5D (2 E, 2 W), C8:60:00 (2 E, 2 W)
Ethernet OUI: 08:60:6E (1 E, 1 W), 30:85:A9 (3 E, 3 W), 50:46:5D (2 E, 2 W), C8:60:00 (2 E, 2 W)
| FCC ID | |
|---|---|
| ASUS DSL-N66U | MSQDSLN66U MSQ-RTN66U |
| ASUS RT-N66W | MSQ-RTN66U |
| CPU1 brand | WI1 chip1 brand | WI2 chip1 brand | |
|---|---|---|---|
| ASUS RT-N66U | Broadcom | Broadcom | Broadcom |
| ASUS RT-N66U C1 | Broadcom | Broadcom | Broadcom |
For a list of all currently documented Broadcom chipsets with specifications, see Broadcom.
Wireless-N900 Dual-Band Gigabit Router
- Dark Knight Double 450Mbps Dual N Band Router
- Product page • Support page • Downloads
Simultaneous Dual-Band, Gigabit Ethernet, 3x3:3 (450Mbps)
- FCC ID: MSQ-RT0K00 - ASUS RT-N66U - PCB Rev.3.3
This router is sold in some locations as the RT-N66R.
- It is also available in white as the RT-N66W.
The CPU is part BCM4706KPBG. The switch is part BCM53125SKMML.
- Revision B2 is the same as B1, but have different CFE version.
- Asus RT-N66U on TechInfoDepot (pictures)
Annihilator666's photos have a sticker on the device showing an:
- OUI of 10:BF:48, LAN OUI of 20:CF:30, presumably, 50:46:5D OUI
Wi-Fi Certified : WFA12169 (as of 07/30/2011)
- ASUS RT-N66U C1 (MSQ-RTACHC00) • Product page • Support page
- Model: RT-N66U C1, H/W ver B2, F/W ver 3.0.0.4.382_19333
- CPU: Broadcom BCM4708 (ARM); 1x USB 3.0, 1x USB 2.0
- (odmpid == "RT-N66U_C1" || odmpid =="RT-AC66U_B1" || odmpid == "RT-AC1750_B1")
Reviews
Forum threads
- Asus RT-N66U on wl500g.info forums
- Internals and boot log on VR-Zone forums
- Info from BrainSlayer (DD-WRT forums),
Other
- How to flash RT-N66U with Shibby's TomatoUSB firmware
- (SOLVED) Need help debricking my RT-N66U
- Temperature.sh for Asus RT-N66U for Tomato
- Stealth Mode (Timer function) RT-N66
- RT-N66U cfe - Original
- RT-N66 CFE Thread
- Flashing DD-WRT onto Asus RT-N66U
- Merlin mod of official firmware Asus
- On the DD-WRT forum
- On the TomatoUSB forum
- On the TomatoUSB forum again
- On the SNB forum
- On the SNB forum
- TomatoUSB VPN
- TomatoUSB (Shibby) on the RT-N66U
- Label shot and misc. pictures
Flashing
| NOTE: During configuration or flashing a device, the only things that should be hooked to the device is the computer and power. |
Flashing TomatoUSB
| NOTE: TomatoUSB Shibby AIO build supports onboard MicroSD socket. |
| WARNING: Requires K2.6RT-N for TomatoUSB, Do not flash anything else. |
- Set static IP address on computer of 192.168.1.10
- Download the file tomato-K26USB-1.28.RT-N5x-MIPSR2-101-AIO-64K.trx
- Put the router into recovery mode by holding down the reset button
in the back of the router and plug the power in.
Continue holding the reset button until the power lights blinks slow,
then release the reset button. - Use the Asus recovery disk and upload the tomato firmware.
- Wait until it finish, about 5min. If you do not wait you will brick it.
- Power down the router.
- Power up the router and you now have tomato on it.
- Reset nvram (Thorough).
Flashing DD-WRT
| NOTE: Use build 18946, it fixes the WAN port issue. |
| WARNING: The RT-N66U does REQUIRE the K26 Firmware builds as Broadcom has not released drivers for the non-K26 builds. (Read more here: Recommended Firmwares). |
NVRAM issue
| 25-May-2013: Since BrainSlayer posted some experimental K3.X Images, the NVRAM Issue becomes almost obsolete. Please have a look at the Installation Instructions for further instructions. |
| WARNING: 9-Apr-2013: It seems more recently manufactured units come pre-loaded with the 64K v1.0.1.3 CFE and so are not compatible with standard DD-WRT builds. Flashing a standard DD-WRT build on these devices will result in a brick. As it is impossible to know which CFE version you unit has when running the stock firmware, anyone wishing to flash DD-WRT on this device is advised to follow this guide: http://charleswilkinson.co.uk/2012/12/22/dd-wrt-on-the-asus-rt-n66u-with-64k-cfe/ These instructions should be updated when an official build becomes available. |
| 1-Nov-2012: Fractal has indicated that the NVRAM is resolved and that 5Ghz is working. [1] |
| 30-Oct-2012: RT-N66 CFE Thread Link to discussion implementing 64K: not sure that this is ready for prime time yet, however, if you try this and feel it is ready, UPDATE THIS STATEMENT and publish the procedure, limitations, and results. |
As of June 2012 there is an issue with NVRAM all but being filled by the default DD-WRT installation. Until this issue is resolved, please know about the pro and cons of this issue, before you install DD-WRT on this router.
There are however frequent general news about this issue. If not daily, then weekly news. And eventually a solution to (preferably a 60/64K solution) will also reach the DD-WRT community.
As of this writing (June 30, 2012) https://github.com/RMerl/asuswrt-merlin/downloads has implemented a solution, that lives with 32k NVRAM for CFE, but extends to ~60k in firmware.
As of July 16, 2012, TomatoUSB, Shibby has implemented a 64k NVRAM solution that lives with 32K NVRAM for CFE See Flashing TomatoUSB
Principle steps
- Clear settings (Clear NVRAM) select Factory Default settings
- Install the INITIAL ASUS RT-N66U version of DD-WRT (file name ends in .trx) using either
- the Web GUI method or the Recover Utility method. Both methods are described below
- Clear settings (Clear NVRAM) select Factory Default settings
- "Upgrade" to your final version of DD-WRT (filename ends in .bin) using Web GUI or Recovery Utility
- Clear settings (Clear NVRAM) select Factory Default settings
- Note: is IMPORTANT to Clear NVRAM (to select Factory Default settings) BEFORE and AFTER upload of any new firmware.
Upload Firmware via Web GUI
- Clear settings (Clear NVRAM) select Factory Default settings.
- Upload the .trx file using the stock web GUI.
- Wait for the router to re-boot on its own. This may easily take 10–15 minutes to happen, so just be patient.
- Clear settings (Clear NVRAM) select Factory Default settings. Wait for the router to re-boot on its own!!! May take 10 minutes or more
Upload Firmware via Recovery Utility
- Set your NIC card to static IP 192.168.1.12, Subnet 255.255.255.0, Default gateway 192.168.1.1 (Static IP guide)
- Put router into recovery mode by holding down the reset button while powering up the router, wait until the power led is blinking slowly, then release the reset button.
- In the Asus Recover utility Access the router’s built in recovery mode by issuing 192.168.1.1 in browser field.
- Flash the initial DD-WRT build (e.g.) Asus-RT-N66U_18946_mini.trx build and upload.
- When completed wait until the router re-boots on its own. This takes at least 10 minutes.
- Put router into recovery mode by holding down the reset button while powering up the router,
- wait until the power led is blinking slowly, then release the reset button.
- Flash the final DD-WRT build, could be any of:
Simple Instructions (Works for most)
1 Holding the reset botton with out energy cable, connect energy cable and switch
- on the router with the reset botton pressed till the "on" led blinks slowly.
2 Try httр://192.168.1.1 and now you see the MiniWebserver.
3 Klick Durchsuchen und in the Fileserver search the Firmware.trx and click open.
(Click Browse and in the Fileserver search locate the Firmware.trx and click open.)
Now click Upload
4 When the firmware fully loaded click Continue.
You are back to the MiniWebServer , now click Restore default NVRAM values.
5 Now get http://192.168.1.1/do.htm?cmd=nvram+commit into the Browser and press Enter
6 Now click Continue and then click Reboot
7 Try http://192.1.68.1.1 and set Username and Password
If you are not fast enough and the router reboots then you can do step
- 1,Clear NVRAM and do step 5&6 without loading firmware again.
- When completed wait until the router re-boots on its own. This takes at least 10 minutes.
- Put router into recovery mode by holding down the reset button while powering up the router,
- wait until the power led is blinking slowly, then release the reset button.
- Select Reset NVRAM defaults when it completes (should be quick), in the browser field,
- type in
httр://192.168.1.1/do.htm?cmd=nvram+commit.
- When done press enter. When complete select reboot and wait 5–10 minutes
- for the router to reboot and start building its layers.
- Now you should be able to access via web gui 192.168.1.1 and it should be DD-WRT.
Upgrading
Updating DD-WRT
If dd-wrt is already on the router follow these instructions. If stock firmware is on the router follow the flashing instructions.
- Check for recommended builds here first.
- Set your computer to a static IP of 192.168.1.7. (or to whatever subnet the router is on) Disable all firewalls and security. Disable wireless on your computer and only have the router connected to the flashing computer by the ethernet cable between the two.
- Hard reset or 30/30/30 (If the router supports it, if not, reset to defults in the GUI) prior to flashing. Wait. Check for password page on re-login and change password.
- Flash firmware. You can use the webgui except if you have a belkin router. (For belkin use tftp.exe to flash)
- Wait...at least three minutes. Lights should return to normal. See important2, below. Failing to wait is how most people brick their routers.
- Do a power cycle of the router. (Unplug the cord, count to 30 and plug it back in.)
- Wait for the lights to return to normal usually about 2 minutes.
- Hard reset or 30/30/30 again (If the router supports it, if not, reset to defults in the GUI). Wait. Check for the password page and re-login to change the password. Then you can reconfigure your settings manually.
- Once configured set your computer back to autoIP and autoDNS.
Important1: This Hard reset or 30/30/30 works fine for Asus router, but you do have to power cycle after the reset.
Important2: After you flash the firmware, and before you do the hard reset, the router will be building some nvram settings. YOU MUST WAIT FOR THIS TO FINISH PRIOR TO DOING ANYTHING WITH THE ROUTER INCLUDING A HARD RESET. Usually, you can tell when this process is completed by the WAN light coming on, but it does take several minutes. Go have a beer. There are starting to be more and more people who BRICK their routers by not waiting until the nvram is rebuilt, PRIOR to doing a hard reset. YOU NEED TO WAIT!
JTAG-Serial Info
JTAG
RT-N66U Jtag On DD-WRT forum
JTAG Pinouts
J2 sure looks like a JTAG header
1 © nTRST |  2 ® GND
3 © TDI   |  4 ® GND
5 © TDO   |  6 ® GND
7 © TMS   |  8 ® GND
9 © TCK   | 10 ® GND
Serial
Console connection on N66U and TUMPA board On DD-WRT forum
Serial Pinouts
Serial is J1 Serial is J1
 R| VCC  1 © |F
 E|  RX  2 © |R
 A|  TX  3 © |O
 R| GND  4 © |N
             |T
USB Info
DD-WRT USB
- The USB port is where you can connect an external USB hard drive or flash drive.
- Which can do a multitude of things. You can use in as a NAS, storage for a FTP
- server, use Optware to run external programs like torrent software, samba for
- sharing files to network, share a USB printer with network...
- The list of possibilities is long, it just takes a little research.
- ProFTPd is included in most the newer builds of dd-wrt.
- Check the features chart to be sure.
Tomato
TomatoUSB comes with file sharing, ftp server and media server built in.
Tutorial: How to set up NAS and Optware on Tomato FOR TOTAL NOOBS
VLAN Info
DD-WRT VLAN Info
Pictures
Notes
Hardware Modification
MicroSD
 sdhci: Secure Digital Host Controller Interface driver
 sdhci: Copyright(c) Pierre Ossman
After sticking in a 2GB MicroSD card and rebooting, the card is seen and mounted to /tmp/mnt/sda1
 df -h
 Filesystem                Size      Used Available Use% Mounted on
 /dev/root                17.0M     17.0M         0 100% /
 tmpfs                   124.8M    412.0K    124.4M   0% /tmp
 devfs                   124.8M         0    124.8M   0% /dev
 /dev/sda1                 1.9G     24.0K      1.9G   0% /tmp/mnt/sda1
Contents can be shared via samba in OEM firmware, now to figure out
- how to run custom scripts from the oem firmware.
Mounted MicroSD Card in TomatoUSB
Card was partitioned and formated in Ubuntu with GParted
- On InfoDepot Moved to TechInfoDepot
- Info from BrainSlayer (DD-WRT forums)
- Internals and boot log on vr-zone forums
- Reviewed on SmallNetBuilder
LAN OUI of 20:CF:30, presumably. This is assumed to be a BCM4706 device.
Trouble with recovery mode
I just want to give a tip for anybody who has trouble getting into recovery mode. I didn't find this simple information on the internet yet. First, some context:
I flashed a Brainslayer build from a Fractal build, and then my router stopped responding to ping. When booting normally, the power and ethernet LEDs would light up. The same thing happened when booting up with the reset button pressed, which should have put into recovery mode, but didn't. When booting up with the WPS button pressed, the power LED would flash and clear the NVRAM. The router then started up and enabled the two radios, broadcasting a "dd-wrt" SSID, but still no ping.
To force it into recovery mode:
- Set a static IP of 192.168.1.2
- Press the WPS button and start up
- Let the power LED flash rapidly for 5 seconds, then release WPS
- Immediately press the reset button, keeping it pressed until the power LED flashes slowly
- Release the reset button
- Point your browser to 192.168.1.1
Voilà.


