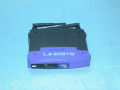
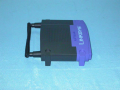
Linksys WRT54GS v1.0
Linksys WRT54GS v1.0
Manuf (OEM/ODM): CyberTAN
FCC approval date: 26 November 2003
Country of manuf.: China
S/N prefix: CGN0 or CGN1
Series: WRT54GS
Local image
Type: wireless router
FCC ID: Q87-WRT54GV2
IC ID: 3839A-WRT54GV2
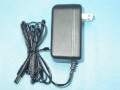
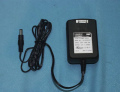
Power: 12 VDC, 1 A
Connector type: barrel
Conn. measurements: 5 mm (OD), 2.5 mm (ID), 12 mm (LEN)
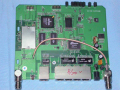
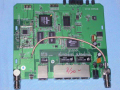
CPU1: Broadcom BCM4712 (200 MHz)
FLA1: 8 MiB8,388,608 B <br />65,536 Kib <br />8,192 KiB <br />64 Mib <br />0.00781 GiB <br /> (Intel TE28F640J3C-120)
RAM1: 32 MiB33,554,432 B <br />262,144 Kib <br />32,768 KiB <br />256 Mib <br />0.0313 GiB <br /> (ICSI IC42S16800-7T × 2)
Expansion IFs: none specified
JTAG: yes, 12-pin header, unpopulated
Serial: yes, 10-pin header, unpopulated, (115200 8N1)
WI1 chip1: Broadcom BCM4712
WI1 chip2: Broadcom BCM2050
WI1 802dot11 protocols: bg
WI1 antenna connector: RP-TNC
ETH chip1: Broadcom BCM4712
Switch: ADMtek ADM6996L
LAN speed: 100M
LAN ports: 4
WAN speed: 100M
WAN ports: 1
bg
Stock bootloader: CFE
Stock FW OS: Linux 2.4
TPFirmware supported: DD-WRT • (List), OpenWrt • (List | Dev | DLs), Tomato • (List | DLs), TomatoUSB • (List | DLs), Broadband-Hamnet
Default SSID: linksys (50 addl. devices)
Default IP address: 192.168.1.1
the IP 192.168.1.1 is used by 1304 additional devices
of which 154 are Linksys devices
Default login user: blank
Default login password: admin
blank:admin credentials used by 300 additional devices
of which 143 are Linksys devices
802dot11 OUI: 00:0F:66 (8 E, 26 W), 00:12:17 (16 E, 32 W)
Ethernet OUI: 00:0F:66 (8 E, 26 W), 00:12:17 (16 E, 32 W)
| FCC ID | |
|---|---|
| Linksys WRT54G v2.0 | Q87-WRT54GV2 |
| CPU1 brand | WI1 chip1 brand | WI1 chip2 brand | |
|---|---|---|---|
| Linksys WRT54GS v1.0 | Broadcom | Broadcom | Broadcom |
| Linksys WRT54GS v1.1 | Broadcom | Broadcom | Broadcom |
| Linksys WRT54GS v2.0 | Broadcom | Broadcom | Broadcom |
| Linksys WRT54GS v2.1 | Broadcom | Broadcom | Broadcom |
| Linksys WRT54GS v3 | Broadcom | Broadcom | Broadcom |
| Linksys WRT54GS v4 | Broadcom | Broadcom | Broadcom |
| Linksys WRT54GS v5.0 | Broadcom | Broadcom | Broadcom |
| Linksys WRT54GS v5.1 | Broadcom | Broadcom | Broadcom |
| Linksys WRT54GS v6.0 | Broadcom | Broadcom | Broadcom |
| Linksys WRT54GS v7.0 | Broadcom | Broadcom | |
| Linksys WRT54GS v7.2 | Broadcom | Broadcom |
For a list of all currently documented Broadcom chipsets with specifications, see Broadcom.
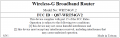
Wireless-G Broadband Router with SpeedBooster
Wi-Fi Certified : W002142 (as of 04/02/2004)
Links of Interest
- WRT54G series on Wikipedia
- Linksys WRT54Gxx page on the DD-WRT wiki
- Linksys WRT54G, WRT54GL and WRT54GS page on the OpenWrt wiki
- WRT54GS v1.0 & WRT54G v2.0 MMC/SD Mod (In Russian)
Flashing
| NOTE: During configuration or flashing a device, the only things that should be hooked to the device is the computer and power. |
Flashing DD-WRT
| NOTE: Resetting to factory defaults via reset button or mtd erase nvram is safe on this unit. |
| For DD-WRT, These units seems to run more stable on the VINT builds. |
| WARNING: Requires K2.4 for DD-WRT, Do not flash anything else! |
- Connected power and Ethernet cable to the router.
- 30-30-30 Hard Reset.
- Waited until lights returned to normal (longer is better).
- •• There is A LOT of WAITING. Cannot emphasize that enough. Waiting is the key. ••
- Connected to http://192.168.1.1 using Internet Explorer.
- Logged in and flashed with dd-wrt.v24-13491_VINT_mini via the web interface.
- Waited until Upgrade Successful message and lights returned to normal (longer is better).
- Connected to http://192.168.1.1 using Internet Explorer and logged in to look around.
- Closed Internet Explorer.
- 30-30-30 Hard Reset.
- Waited until lights returned to normal (longer is better).
- Check for recommended builds here.
Flashing OpenWrt
Flashing Tomato
Flashing Gargoyle
Upgrading
Updating DD-WRT
If dd-wrt is already on the router follow these instructions. If stock firmware is on the router follow the flashing instructions.
- Check for recommended builds here first.
- Set your computer to a static IP of 192.168.1.7. (or to whatever subnet the router is on) Disable all firewalls and security. Disable wireless on your computer and only have the router connected to the flashing computer by the ethernet cable between the two.
- Hard reset or 30/30/30 (If the router supports it, if not, reset to defults in the GUI) prior to flashing. Wait. Check for password page on re-login and change password.
- Flash firmware. You can use the webgui except if you have a belkin router. (For belkin use tftp.exe to flash)
- Wait...at least three minutes. Lights should return to normal. See important2, below. Failing to wait is how most people brick their routers.
- Do a power cycle of the router. (Unplug the cord, count to 30 and plug it back in.)
- Wait for the lights to return to normal usually about 2 minutes.
- Hard reset or 30/30/30 again (If the router supports it, if not, reset to defults in the GUI). Wait. Check for the password page and re-login to change the password. Then you can reconfigure your settings manually.
- Once configured set your computer back to autoIP and autoDNS.
Important1: This Hard reset or 30/30/30 works fine for Asus router, but you do have to power cycle after the reset.
Important2: After you flash the firmware, and before you do the hard reset, the router will be building some nvram settings. YOU MUST WAIT FOR THIS TO FINISH PRIOR TO DOING ANYTHING WITH THE ROUTER INCLUDING A HARD RESET. Usually, you can tell when this process is completed by the WAN light coming on, but it does take several minutes. Go have a beer. There are starting to be more and more people who BRICK their routers by not waiting until the nvram is rebuilt, PRIOR to doing a hard reset. YOU NEED TO WAIT!
Reverting
Reverting to OEM Firmware from DD-WRT
- Read the peacock announcement found here: forums
- Do a Hard reset or 30/30/30 on the router according to note 1 of the peacock announcement (30/30/30)
- Set a static IP on your computer to 192.168.1.7. Subnet mask should be 255.255.255.0.
- Connect the lan cable from your computer to a LAN port of your router. Make sure your router is plugged in. Nothing should be connected to your computer or the router except the lan cable between them. Turn your firewall and any wireless computer connections OFF.
- Power cycle the router (uplug the power from the router for 30 seconds and then plug it back in)
- Open your browser to 192.168.1.1 by putting that in the browser address window of your browser. You should open the linksys webgui and NOT a page that says Management Mode. If you see management mode, power cycle the router again.
- Enter your username and password
- Go to administration and firmware upgrade
- Navigate to the folder that you are using, and select WRT54GSv3_4.71.4.001_fw.bin.
- Hit upgrade
- When you get a success, wait FIVE FULL minutes.
- When you can again access the Linksys webgui using a browser at 192.168.1.1, do another Hard reset or 30/30/30 on the router.
- Reset your computer ethernet connection to auto IP and auto DNS
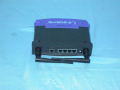
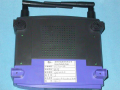
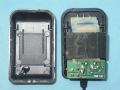
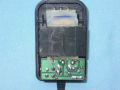
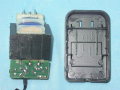
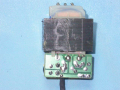
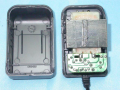
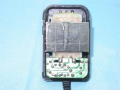
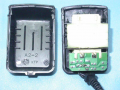
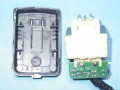
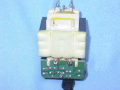
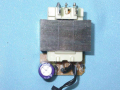
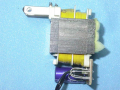
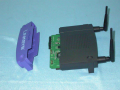
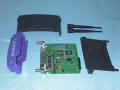
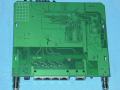
Pictures
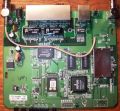
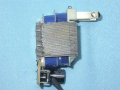
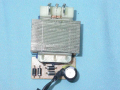
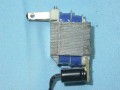
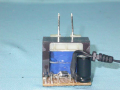
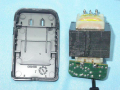
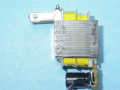
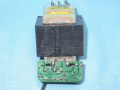
CGN1 Board top
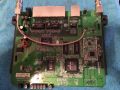
RayKnight's unit


WRT54GV.2
WRT54GV.2
WRT54GV.2
WRT54GV.2
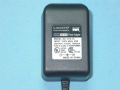
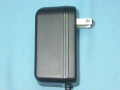
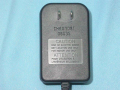
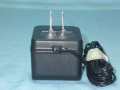
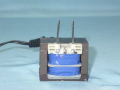
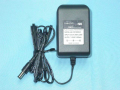
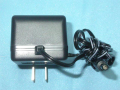
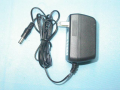
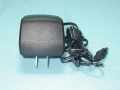
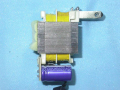
Model D12-1A
Model D12-1A
Model D12-1A
Model D12-1A
Model D12-1A
Model D12-1A
Model D12-1A
Model D12-1A
Model D12-1A
Model D12-1A
Model D12-1A
Model D12-1A
Model D12-1A
Model D12-1A
Model D12-1A
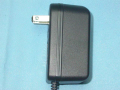
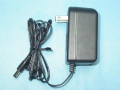
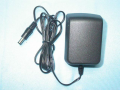
Model AM-1201000D41
Model AM-1201000D41
Model AM-1201000D41
Model AM-1201000D41
Model AM-1201000D41

Model AM-1201000D41
Model AM-1201000D41
Model AM-1201000D41
Model AM-1201000D41

Model AM-1201000D41

Model AM-1201000D41
Model AM-1201000D41
Model AM-1201000D41
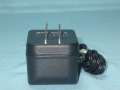
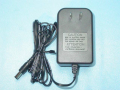
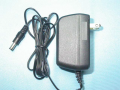
Model 411210OO3CT
Model 411210OO3CT
Model 411210OO3CT
Model 411210OO3CT

Model 411210OO3CT
Model 411210OO3CT
Model 411210OO3CT
Model 411210OO3CT
Model 411210OO3CT
Model 411210OO3CT
Model 411210OO3CT
Model 411210OO3CT
Model 411210OO3CT
Model 411210OO3CT
WRT54GV.2
WRT54GV.2
WRT54GV.2
WRT54GV.2
WRT54GV.2
Label


JTAG-Serial Info
JTAG
JTAG Pinouts
 nTRST  1o o2	GND
   TDI  3o o4	GND
   TDO  5o o6	GND
   TMS  7o o8	GND
   TCK  9o o10	GND
 nSRST 11o o12  N/C
Using Universal JTAG Adapter
  white  1o o2	 black
    red  3o o4	 GND
   blue  5o o6	 GND
  green  7o o8	 GND
 yellow  9o o10  GND
 orange 11o o12  N/C
- /noemw switch required for flash
JTAG Recovery to DD-WRT
JTAG:
- Backup CFE x2 (Compare the files, they must match exactly or there is something wrong with your JTAG setup)
- Erase Wholeflash x2
- Flash CFE
- Unplug Power
- Unplug JTAG Cable
TFTP:
- Set Rig ip static 192.168.1.10
- Plug network cable from rig to port 1
- Get TFTP ready, server ip - 192.168.1.1, Password - blank, file - dd-wrt.v24_mini_generic.bin
- Plug in power
- Wait for DMZ light to do a steady pulse, When it is lit on the 3rd time click upgrade.
- The DMZ light must be lit when you click upgrade.
- Hard Reset 30\30\30
Serial
Serial Pinouts
 VCC  1 o o 2  VCC
 TX1  3 o o 4  TX0
 RX1  5 o o 6  RX0
 N/C  7 o o 8  N/C
 GND  9 o o 10 GND
Hyper terminal Setup in Windows XP
In Windows XP, Click Start Button - All Programs - Accessories -
   Communication - HyperTerminal
Enter a name for the connection, Click ok
Choose com port you adapter is plugged into, Click ok
Set:
 Bits per second = 115200
 Data Bits = 8
 Parity = none
 Stop bits = 1
 Flow control = none
Click ok
Click File - Save As, and select a place to save it to so you
             don't have to enter the settings again.
Putty Setup in Windows XP
After installing putty, run it
 Serial line = The COM port your using for serial (ie. COM3)
 Speed = 115200
Click on Serial under Connection
 Serial line to connect to = same as above (Serial line)
 Speed (baud) = 115200
 Data bits = 8
 Stop bits = 1
 Parity = none
 Flow control = none
Click Session
 Enter a name for your connection under saved sessions
Click Save
Click Open
Serial Recovery
1= Serial Recovery Instructions!
Notes
DD-WRT Notes
Source Unknown
I installed dd-wrt.v24-13064_VINT_std.bin directly from Linksys web interface (v4.7 something) using the standard process.Getting great signal to my wireless clients and playing around with all my new features
- 30-30-30 Hard Reset (no forced password reset from orig Linksys firmware)
- Use firmware update page.......wait...wait...wiat
- reboot....wait....wait...wait
- 30-30-30 Hard Reset (forced password reset from new dd-wrt firmware)
- Configure ppoe, connect to DSL modem in bridged mode, enjoy
comment added 17/05/08 by 7E0D1450
Reference in dd-wrt forum: [1]
I installed dd-wrt.v24-9433_VINT_mega.bin directly from Linksys Web Interface (Firmware version 2.07.1) without problems or issues. The procedure is:
- Hard Reset (press for 30 secs the reset button - IMPORTANT).
- Upload the firmware from Linksys Web Interface.
- When finished the flashing, Hard Reset (press for 30 secs the reset button - IMPORTANT).
comment added 01-08-2010 by DJJB
I tried to install the mega pack as well through the Linksys Web Interface. Did the resets even the 30-30-30 way, but it bricked my router. The power LED flashes fast and the DMZ sometimes comes up for about 5 seconds. When pinging TTL=100, but doesn't respond to the TFTP-tool anymore.
If it's safer to install the mini version first, you might want to do that first to take less chances...
comment added 18/03/09 by fattrain
I installed dd-wrt.v24-9517_VINT_std.bin directly from Linksys Web Interface (Firmware version Ver.4.71.4) without problems or issues. The procedure is:Enjoy! :-)
- Hard Reset (press for 30 secs the reset button - IMPORTANT).
- Upload the firmware from Linksys Web Interface.
- When finished the flashing, Hard Reset (press for 30 secs the reset button - IMPORTANT).
