Linksys EG008W v1/Fan Mod
Source: http://www.theshoemakers.net/linksys/
Making a Linksys EG008W Gigabit Switch Quiet
Todd Shoemaker
1/10/2005
The Problem
As soon as I plugged in the EG008W gigabit switch, I was surpised at how loud the fan was in the unit. It was high-pitched, rattly, and over time the pitch of the sound would vary and waver. I have very quiet PCs in my home office, and this hub was many many times louder than the three machines running in the office. Besides the loudness, I was concerned with the reliability of the fan in the switch. From the sound, I guessed it was a small chipset fan, and it sounded cheap, which meant it would probably fail within a year or so and could cause the unit to overheat, especially since I would want to hide the unit to mask the noise.
Time for Modification
I decided to modify the unit to make it quieter, and I documented my steps in this document.
DISCLAIMER: PERFORM THESE STEPS AT YOUR OWN RISK. IF YOU TAKE YOUR LINKSYS UNIT APART, YOU WILL VOID YOUR WARRANTY, AND WILL LIKELY BREAK THE UNIT WHILE ELECTROCUTING YOURSELF IN THE PROCESS. I CANNOT BE HELD RESPONSIBLE OR LIABLE FOR ANY DAMAGES OR INJURIES THAT RESULT FROM FOLLOWING THESE INSTRUCTIONS. REPEAT, DO NOT TRY THIS AT HOME!
Now that the disclaimers are out of the way, if you don't care about your warranty and aren't afraid to break open electronic components and use a Dremel and a soldering iron, these steps will hopefully help you along the way.
The Parts
Here is the original (LOUD) unit:
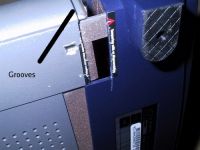
There are no screws to dissassemble the unit, only seams with a sticker telling you that opening the unit will void the warranty. It looked like the bottom would come off first, but I was wrong. The front "hood" comes off, and it is held in place by two grooves on the sides. Push in on the gray plastic just behind the blue front plastic, and pull hard. The front hood will come off. See the grooves in the figure below. Note how much I tore up the bottom of the case finding this out. Now that you know how to do it, you won't have to stick screwdrivers in every seam and hole in the bottom of the unit to try to tear it open. (You're welcome)
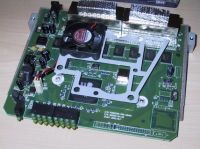
After getting taking the front hood off, the top cover will come right off. The bottom cover is held in place with a small screw, but you shouldn't have to take the board off the bottom cover to perform the modification. Here's what the inside looks like, and notice the the cheap 40mm fan making all that noise:
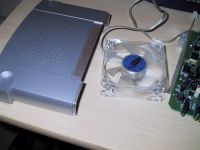
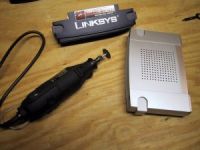
My first plan was to go online and buy a quality ball-bearing 40mm fan and replace the stock fan. After a bit of Googling I found a fan for about $11 USD with shipping that had something like 20dB of noise. But, just before I clicked submit, my frugal side jumped in and remembered that I had a couple of surplus 80mm case fans sitting in the closet doing nothing. These fans last forever, are really quiet, and (best of all) were free. I closed my browser, took everything downstairs to the Dremel, and started to work. Here are the parts used;
My job was to somehow make this fan work with this unit, and not tear anything up or set the house on fire. I noticed that the vent holes in the top of case fit almost exactly in the inner diameter of the 80mm fan intake, so not only were my cutting lines drawn, I would only have to cut about 50% of the material!
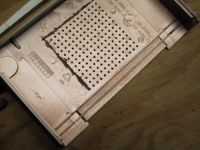
I first started cutting from the top:
And for each cut, I flipped it over and finished cutting from the bottom:
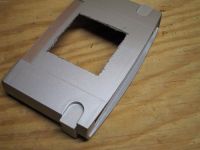
After a bit of noise and a couple of Dremel cutting disks later, the cut was complete, and just needed a bit of smoothing with the sanding attachment.
Now, I put the Linksys case hood back on to use the plastic ridge as a guide, and then I put the fan on top to measure and cut the holes. I didn't have a writing instrument that would reach into the fan holes, so I just very carefully drilled the holes while I held the fan in place. Again, using the Linksys hood to hold the fan in place makes this easy:
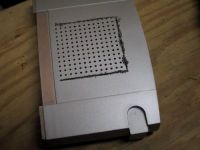
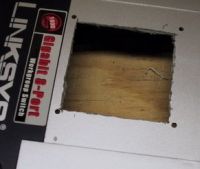
After four drilling four holes, the top of the case looks like this:
The final step was to drill a hole for the fan wire to pass into the case. I used a small spade bit to cut a clean hole for the three-prong fan connector through the case. You can see the hole in the image below.
Final Tweaks
Important! When putting the new fan into this unit, make sure you bind up the excess wire and keep it off the components inside. I don't know how hot some of the chips get, but I didn't want to risk melting the wire insulation, so I kept the wire off the components by winding the excess around the old (disconnected) 40mm fan.
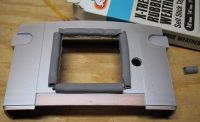
At this point, I put the thing together to see how it would work. It worked fine, but it still wasn't silent, although many times more quiet than before, and the fan pushed a lot more air than the old one. I decided that I needed a buffer between the fan and the case to reduce noise and rattle, and I wanted to slow the fan down with a resistor to make it even more quiet. So, I dug around for something to cushion the fan. I had some leftover door/window sealing material, which is the perfect size for this project, and better yet, it already has adhesive on back. Best of all, it was already sitting around for free. You could easily use cardboard, felt, cloth, or just about anything else. After the padding was in place, the case looked like this (note the spade bit hole on the right for the fan wire):
To slow down the fan, I cut one of the wires connected to the fan, and soldered a 47-ohm resistor in-line, and wrapped it with electrical tape after cleaning the excess wire. I had purchased a 5-pack of these a couple of years ago to slow down a loud chipset fan on an AMD motherboard. They were about $1.99 USD for the pack. Luckily I still have three more left:
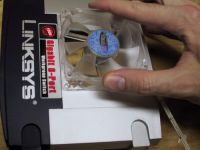
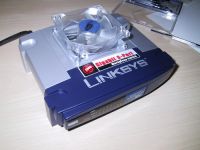
Finally, after attaching the fan to the case with some small (0.5 or 0.75 inch) wood or sheet metal screws I found in the "spare screw" box, the new and improved unit was complete!
Results:
The new unit is almost silent, and even with the fan turning at a reduced rate with the 47-ohm resistor, there is a lot of airflow going through the unit. You can actually feel the intake air on the bottom of the unit with your hand. I would wager that you could stack this unit on top of another one with its fan disconnected, and this one fan would probably keep both units cool.
If you have one of these units and can't handle the noise, there is hope! Enjoy!
-Todd
